Thursday, May 12, 2005
Fifth:start making the real fuel tank
Today I was awestruck by the extent of Tom's knowledge and knowhow. Wow . A workshop full of tools at our disposal. I doubt I'd actually be doing this conversion if Tom wasn't.

(Tom before coffee)
So today was a long day working on making the real actual tank for Mr. Bruce Handbag. From 11am to 5pm phew!
Tom had a bit of leftover stainless steel which was enough to make the tank from.
I laid the cardboard model out on the metal and traced and measured out the long flat bit which wraps around. Then I traced out one of the ends and got a ruler and measured it all. Then Tom looked at it and pointed out that it was 10mm higher on one end than the other so he re-did that bit and traced round a circular grindy thing to get perfect circle shapes at the ends. Humph how unco/freestyle I am.
Then using a spunky olde fashioned machine which i guess is really a mechanical tin snips that looks more like a spaceship from dune, the bits were cut out of the metal. I even cut one out but yes it was a bit messy!
Then Tom took the two end bits and clamped them together and took them to the grinding wheel and made heaps of sparks grinding away untill they were an exact match.
Next to sort out was the copper hose in the tank, which will have hot water running through it to heat up the tank. The spare copper pipe Tom has was old and not happy about bending any more so we went to
Reece's which is a plumbing supply store.
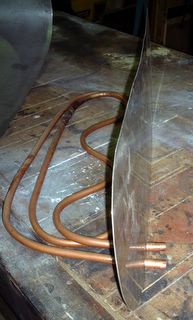
Tank heating coil detail
For my 40L tank we used 3m of Kembla annealed copper pipe which is 15mm diameter and .091mm thick copper that cost $27.94 at Reece's.
Also we bought an internal bending spring for $9.79 this goes inside the copper pipe so you can bend the pipe without squishing it out of shape and making it useless.
And also while we were there we got some Silver Solder Flux for Tom for $15.46. Tom used silver solder to weld the copper to the steel tank.
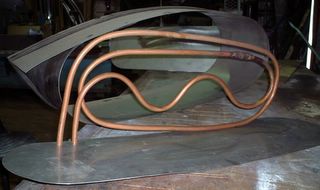
Parts of the tank
SO thats $53.20 spent so far. There is alot of cost which isn't counted there including: Tom's labour, all the fancy equipment in Tom's workshop, the stainless steel sheet, and the bits Tom needed to use like solder stick thingys
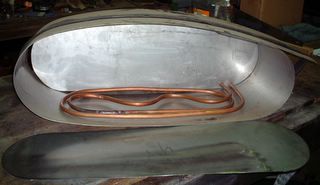
assembling tank
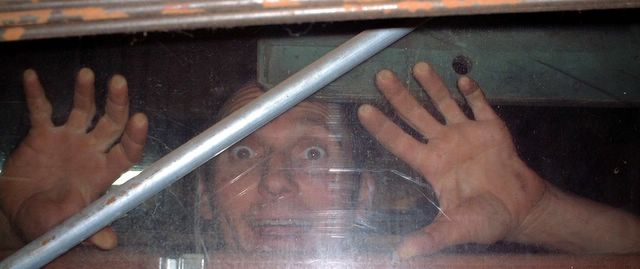
(Tom before coffee)
So today was a long day working on making the real actual tank for Mr. Bruce Handbag. From 11am to 5pm phew!
Tom had a bit of leftover stainless steel which was enough to make the tank from.
I laid the cardboard model out on the metal and traced and measured out the long flat bit which wraps around. Then I traced out one of the ends and got a ruler and measured it all. Then Tom looked at it and pointed out that it was 10mm higher on one end than the other so he re-did that bit and traced round a circular grindy thing to get perfect circle shapes at the ends. Humph how unco/freestyle I am.
Then using a spunky olde fashioned machine which i guess is really a mechanical tin snips that looks more like a spaceship from dune, the bits were cut out of the metal. I even cut one out but yes it was a bit messy!
Then Tom took the two end bits and clamped them together and took them to the grinding wheel and made heaps of sparks grinding away untill they were an exact match.
Next to sort out was the copper hose in the tank, which will have hot water running through it to heat up the tank. The spare copper pipe Tom has was old and not happy about bending any more so we went to
Reece's which is a plumbing supply store.
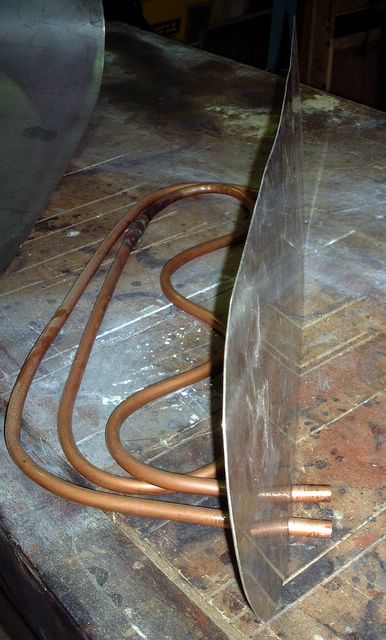
Tank heating coil detail
For my 40L tank we used 3m of Kembla annealed copper pipe which is 15mm diameter and .091mm thick copper that cost $27.94 at Reece's.
Also we bought an internal bending spring for $9.79 this goes inside the copper pipe so you can bend the pipe without squishing it out of shape and making it useless.
And also while we were there we got some Silver Solder Flux for Tom for $15.46. Tom used silver solder to weld the copper to the steel tank.
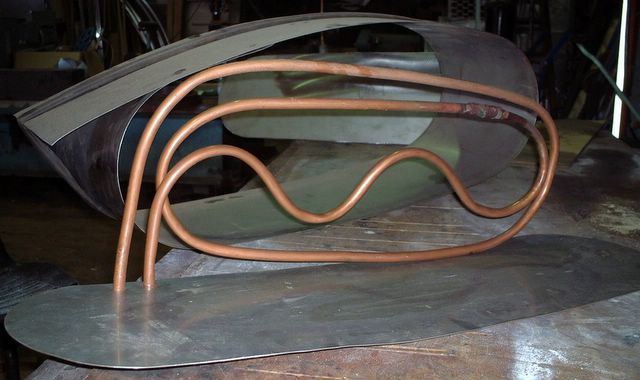
Parts of the tank
SO thats $53.20 spent so far. There is alot of cost which isn't counted there including: Tom's labour, all the fancy equipment in Tom's workshop, the stainless steel sheet, and the bits Tom needed to use like solder stick thingys

assembling tank
Friday, May 06, 2005
Fourth: find a friend who can do tricky work
Now you get to meet Tom my olde buddy from way back. Lucky for me Tom bought a Hilux recently and he is keen to do vege oil conversion too. Also very lucky Tom is a metal artist who isn't at all confused about things like solenoids and lines and welding and all that stuff that I don't know.
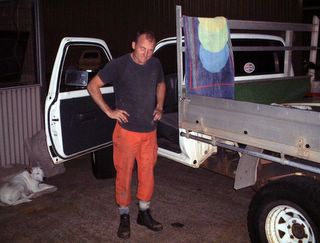
Tom and his Astro -Turfed Hilux outside his workshop. Don't ask me why he pulled that silly pose. Sandwich the dog is resting in the corner.
So I took the tank model around to Tom's workshop

Tom inspects cardboard tank model
So Tom said "cool" and he will probably use a similar tank in his ute. If you look at the top picture of his ute you can see the spot between the mudflap and the white cab under the tray where his tank might fit in.
So Tom is going to make the tanks using his super powers and supplies he has in the workshop.

Dog Rough (Tom) Workshop in Carrington
Then we had a look in Tom's fat catalogue from Blackwoods which you can access online:
www.blackwoods.com.au
These guys have solenoids, filters, hi-temp heater hose, polyethelne hose, tee connectors, o-rings, compression nuts, threaded adapters, switches etc.
So we have most stuff sourced. Probably an auto shop will have anythig else we need.
Tom is also thinking about departing from the whole hose within a hose ratiator cooling scheme and using a 12V heated coil around the lines.
That is is homework to investigate.

Tom and his Astro -Turfed Hilux outside his workshop. Don't ask me why he pulled that silly pose. Sandwich the dog is resting in the corner.
So I took the tank model around to Tom's workshop
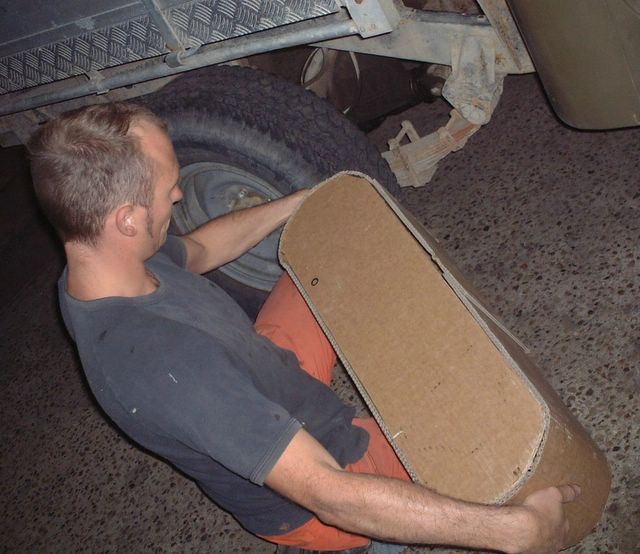
Tom inspects cardboard tank model
So Tom said "cool" and he will probably use a similar tank in his ute. If you look at the top picture of his ute you can see the spot between the mudflap and the white cab under the tray where his tank might fit in.
So Tom is going to make the tanks using his super powers and supplies he has in the workshop.
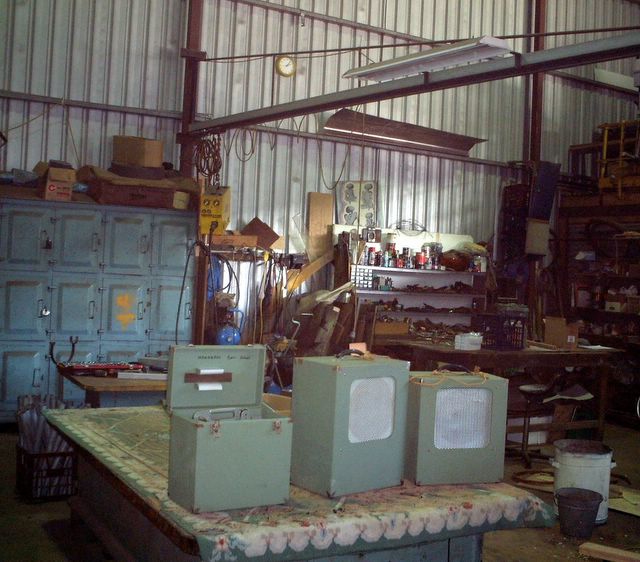
Dog Rough (Tom) Workshop in Carrington
Then we had a look in Tom's fat catalogue from Blackwoods which you can access online:
These guys have solenoids, filters, hi-temp heater hose, polyethelne hose, tee connectors, o-rings, compression nuts, threaded adapters, switches etc.
So we have most stuff sourced. Probably an auto shop will have anythig else we need.
Tom is also thinking about departing from the whole hose within a hose ratiator cooling scheme and using a 12V heated coil around the lines.
That is is homework to investigate.
Wednesday, May 04, 2005
Third: make a cardboard model of your fuel tank
Well today was the day of really starting. I actually got physical rather that cerebral..yipee!
I poked about under mR.Bruce's tray to find a location for my new tank
(to hold the vege oil).
There is lots of room under there for another tank but I had afew things to consider:
1. How far the tank is from the engine. It will be connected with fancy "hose within a hose" lines.. which don't look very cheap.. so the closer the better.
2. How will I fill the tank? For a sticky-outey filler bit, it can't poke out past the tray. I decided between the cab and the tray where there is about 10cm gap.
3. If I am to get the tank under there without pulling the whole tray off (.. possible but tiresome...) I need to be able to manouvre the finished tank into place without undoing any of Bruce.
I found a good place quite close to the front. The dimensions are roughly 65cm x 25cm x25cm, which will allow for about 40L.
So next I made up a cardboard model:
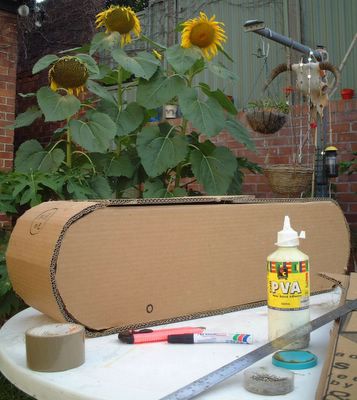
You can see what I used to make it. The cardboard was a big box my washingmachine came in. First I cut out one of the flat sides, and took it back to Bruce's belly. I had to do that about 3 times before I finally cut it down to the right size. Then I traced an exact copy and cut that out. Then I cut a long strip 25cm high. I painted some PVA glue on the edges of one flat bit and wrapped it around, holding it in place with pins. I kept the other flat bit on with 4 pins only, becasuse I might like to look inside later. I made it with three pieces because that is the most likely way the metal tank will be cut and welded.
Then I took the finished tank to Mr.Bruce and slotted it in. You can see on the side where I have mared for the filler hole to go, and the front where the lines in and out might go. I just put one dot now because I'm not sure how many holes or the location. I am going to visit Tom thisarvo. Then we will find out MORE much MORE!
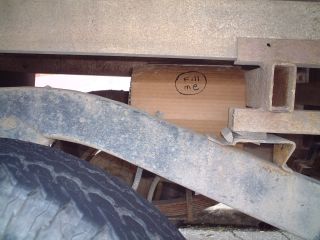
There it is fitting snugly under the tray. We are yet to see if that "fill me" location is correct. Obviously it needs a bit of pipe that will curl up to the space between the cab and the tray, and have a fuel cap on it.
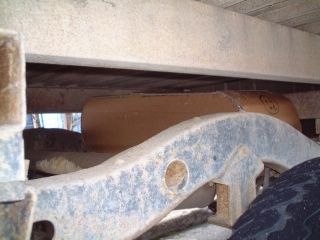
Standing at the back RH side you can see the model tank in place.
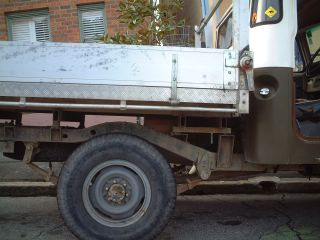
Can you make out the tank above the top RH quadrant of the wheel?
I poked about under mR.Bruce's tray to find a location for my new tank
(to hold the vege oil).
There is lots of room under there for another tank but I had afew things to consider:
1. How far the tank is from the engine. It will be connected with fancy "hose within a hose" lines.. which don't look very cheap.. so the closer the better.
2. How will I fill the tank? For a sticky-outey filler bit, it can't poke out past the tray. I decided between the cab and the tray where there is about 10cm gap.
3. If I am to get the tank under there without pulling the whole tray off (.. possible but tiresome...) I need to be able to manouvre the finished tank into place without undoing any of Bruce.
I found a good place quite close to the front. The dimensions are roughly 65cm x 25cm x25cm, which will allow for about 40L.
So next I made up a cardboard model:

You can see what I used to make it. The cardboard was a big box my washingmachine came in. First I cut out one of the flat sides, and took it back to Bruce's belly. I had to do that about 3 times before I finally cut it down to the right size. Then I traced an exact copy and cut that out. Then I cut a long strip 25cm high. I painted some PVA glue on the edges of one flat bit and wrapped it around, holding it in place with pins. I kept the other flat bit on with 4 pins only, becasuse I might like to look inside later. I made it with three pieces because that is the most likely way the metal tank will be cut and welded.
Then I took the finished tank to Mr.Bruce and slotted it in. You can see on the side where I have mared for the filler hole to go, and the front where the lines in and out might go. I just put one dot now because I'm not sure how many holes or the location. I am going to visit Tom thisarvo. Then we will find out MORE much MORE!

There it is fitting snugly under the tray. We are yet to see if that "fill me" location is correct. Obviously it needs a bit of pipe that will curl up to the space between the cab and the tray, and have a fuel cap on it.

Standing at the back RH side you can see the model tank in place.
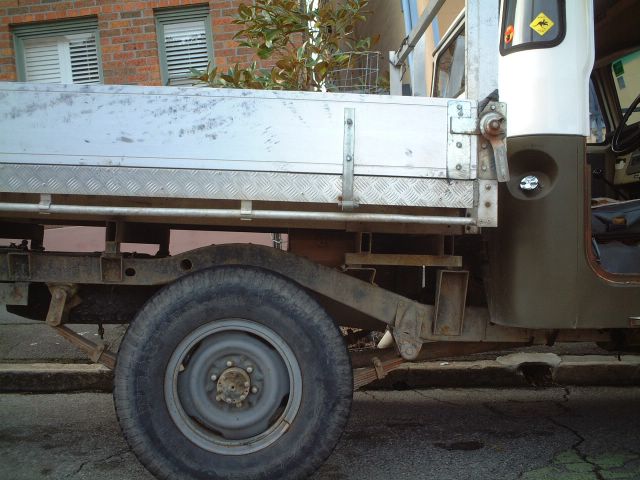
Can you make out the tank above the top RH quadrant of the wheel?
Second: Do some research; read books and serch the web
Who knows, maybe this is the First step... whatever.
At some early stage, a bit of RESEARCH is good.
But it can be confusing!
My most helpful things were:
The book by Joshua Tickell "From the Fryer to the Fuel Tank"
The following websites:
At some early stage, a bit of RESEARCH is good.
But it can be confusing!
My most helpful things were:
The book by Joshua Tickell "From the Fryer to the Fuel Tank"
The following websites:
- Alternative Technology Association (Australian)
- This Australian scientific reseach paper is very informative
- Journey to Forever
- Vegburner
- Greasel :this informative website is a bit involved in selling its own stuff
I assume you have read some of this stuff or have some idea about the dual tank ( diesel tank/heated vege oil tank) system as I progress in my history.
I am not giving lessons on how to do it, just showing you what I am doing.
First: Buy a diesel Vehicle
The First thing you need is a Diesel vehicle! You can't convert petrol or gas to vegetable oil. I hear that Rudolf Diesel designed his engine to run on peanut oil originally.
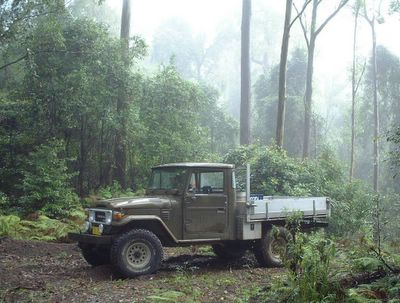
Here is my handsome beast. His name is "Mr.Bruce Handbag".
He is a Toyota Land Cruiser HJ47.
This picture shows him driving to my property near Dungog. Obviously a big Ute like this is good for me. There are much smaller diesel cars available!
This was my first step to running a vege oil vehicle. I took this step about 3 years ago! About time for the second step!
.
Here is my handsome beast. His name is "Mr.Bruce Handbag".
He is a Toyota Land Cruiser HJ47.
This picture shows him driving to my property near Dungog. Obviously a big Ute like this is good for me. There are much smaller diesel cars available!
This was my first step to running a vege oil vehicle. I took this step about 3 years ago! About time for the second step!

.
![]()
