Wednesday, May 04, 2005
Third: make a cardboard model of your fuel tank
Well today was the day of really starting. I actually got physical rather that cerebral..yipee!
I poked about under mR.Bruce's tray to find a location for my new tank
(to hold the vege oil).
There is lots of room under there for another tank but I had afew things to consider:
1. How far the tank is from the engine. It will be connected with fancy "hose within a hose" lines.. which don't look very cheap.. so the closer the better.
2. How will I fill the tank? For a sticky-outey filler bit, it can't poke out past the tray. I decided between the cab and the tray where there is about 10cm gap.
3. If I am to get the tank under there without pulling the whole tray off (.. possible but tiresome...) I need to be able to manouvre the finished tank into place without undoing any of Bruce.
I found a good place quite close to the front. The dimensions are roughly 65cm x 25cm x25cm, which will allow for about 40L.
So next I made up a cardboard model:
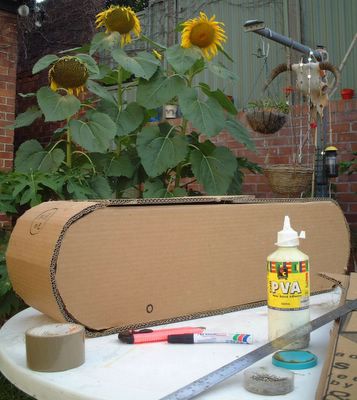
You can see what I used to make it. The cardboard was a big box my washingmachine came in. First I cut out one of the flat sides, and took it back to Bruce's belly. I had to do that about 3 times before I finally cut it down to the right size. Then I traced an exact copy and cut that out. Then I cut a long strip 25cm high. I painted some PVA glue on the edges of one flat bit and wrapped it around, holding it in place with pins. I kept the other flat bit on with 4 pins only, becasuse I might like to look inside later. I made it with three pieces because that is the most likely way the metal tank will be cut and welded.
Then I took the finished tank to Mr.Bruce and slotted it in. You can see on the side where I have mared for the filler hole to go, and the front where the lines in and out might go. I just put one dot now because I'm not sure how many holes or the location. I am going to visit Tom thisarvo. Then we will find out MORE much MORE!
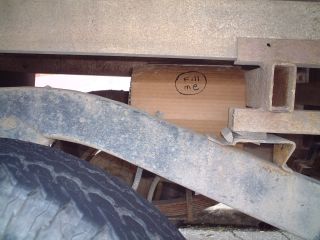
There it is fitting snugly under the tray. We are yet to see if that "fill me" location is correct. Obviously it needs a bit of pipe that will curl up to the space between the cab and the tray, and have a fuel cap on it.
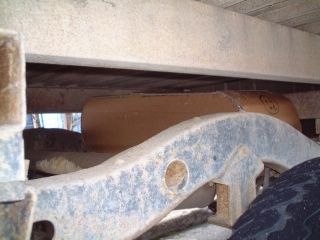
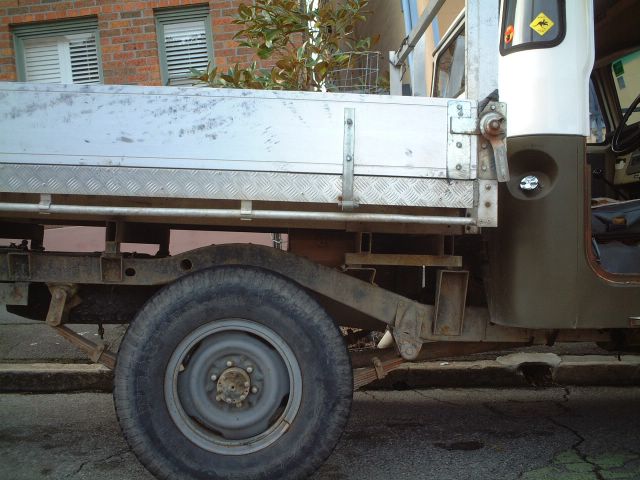
Standing at the back RH side you can see the model tank in place.
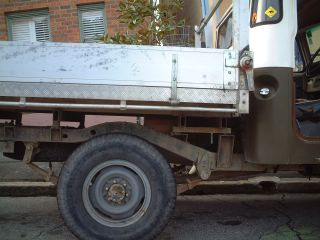
Can you make out the tank above the top RH quadrant of the wheel?
I poked about under mR.Bruce's tray to find a location for my new tank
(to hold the vege oil).
There is lots of room under there for another tank but I had afew things to consider:
1. How far the tank is from the engine. It will be connected with fancy "hose within a hose" lines.. which don't look very cheap.. so the closer the better.
2. How will I fill the tank? For a sticky-outey filler bit, it can't poke out past the tray. I decided between the cab and the tray where there is about 10cm gap.
3. If I am to get the tank under there without pulling the whole tray off (.. possible but tiresome...) I need to be able to manouvre the finished tank into place without undoing any of Bruce.
I found a good place quite close to the front. The dimensions are roughly 65cm x 25cm x25cm, which will allow for about 40L.
So next I made up a cardboard model:

You can see what I used to make it. The cardboard was a big box my washingmachine came in. First I cut out one of the flat sides, and took it back to Bruce's belly. I had to do that about 3 times before I finally cut it down to the right size. Then I traced an exact copy and cut that out. Then I cut a long strip 25cm high. I painted some PVA glue on the edges of one flat bit and wrapped it around, holding it in place with pins. I kept the other flat bit on with 4 pins only, becasuse I might like to look inside later. I made it with three pieces because that is the most likely way the metal tank will be cut and welded.
Then I took the finished tank to Mr.Bruce and slotted it in. You can see on the side where I have mared for the filler hole to go, and the front where the lines in and out might go. I just put one dot now because I'm not sure how many holes or the location. I am going to visit Tom thisarvo. Then we will find out MORE much MORE!

There it is fitting snugly under the tray. We are yet to see if that "fill me" location is correct. Obviously it needs a bit of pipe that will curl up to the space between the cab and the tray, and have a fuel cap on it.

Standing at the back RH side you can see the model tank in place.
Can you make out the tank above the top RH quadrant of the wheel?
![]()
